By clicking on one of the items, the information related to the different sections or paragraphs will be displayed, allowing them to be edited independently.
To edit the sections, click on the “ Edit ” icon. ![]()
Once you have modified the content of the section, click “ Save as draft ” (in this case a version will be created but the version will not be displayed on the public portal until it is published) or “ Publish ” if you want to publish the revised content.
If you want to edit the field of an item but without this change being visible to end users, you will need to save the version as a draft. To do this, click on “ save as draft ” and it will be saved in the version history.
For items that have a data model for manual entry, to add records click the “ Add Indicator Record ” button . The dialog box with the fields of the data resource to which we want to add the new record will then be displayed.
To edit the data entered manually, click on the “ Edit ” icon next to the record. The dialog box with the data resource fields will then be displayed and you will be able to edit its content.
Once modified, click on the “ Save as draft ” function. (if you want to create a version, but the changes will not be publicly shown until it is published) or “ Publish ” if you want to publish the already revised content.
To delete a record from the content, click on the Delete icon on the line of the record you want to delete.
You will then be asked for confirmation. By clicking “Yes” the record will be deleted.
For items that have automatic data, you must click on the indicator that shows the data to display its content and you will see that at the top of the data section a bar is displayed with the options Do you want the automatically loaded data to be visible? . Then you must choose the desired option.
For items that have automatic data graphs, when you click on the indicator that shows the graphs to display their content, you will see that at the top of the graph a bar is displayed with the options Do you want this graph to be visible? You must choose the desired option.
If you want to add more information than the default fields of the item allow, you will need to click on the “edit” option.
An editing panel will then open where you can add additional information to the automatic and/or manual data, in the form of:
- Text
- Links
- Attached documents (with a maximum file size of 100MB)
You will need to choose the More information section and add the desired text or links.
Once you have finished entering the data, you will need to click on “Publish” to save and make the changes visible.
If you want to add an attached document , you will need to choose the Attachments section and click on “Select”.
A tab will open asking you where you want to import the file from. If you have not already uploaded it to another page of the Portal, you will need to click on “Add” and choose “Basic Document”.
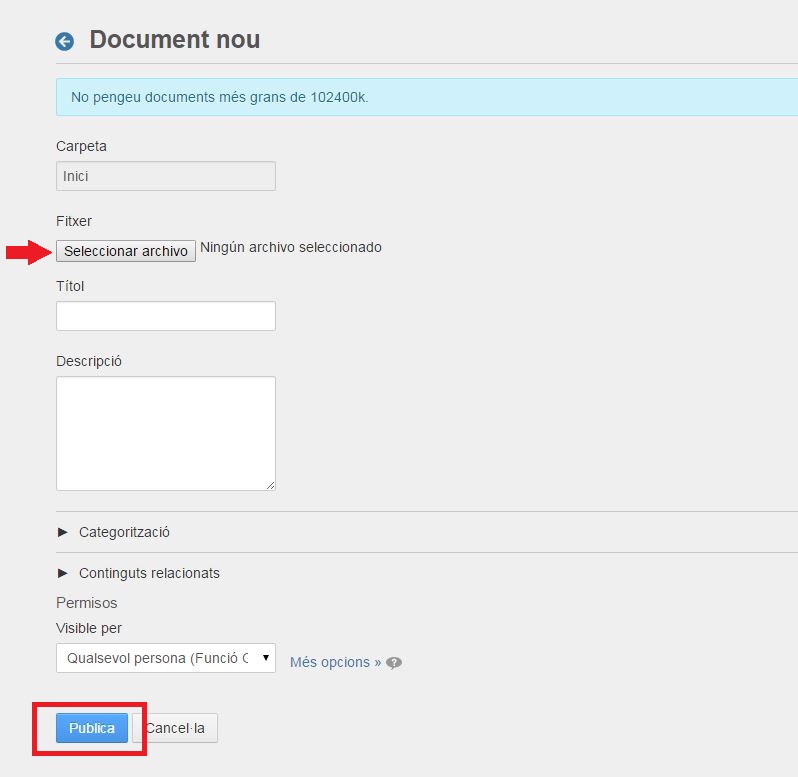
In this new screen that will be displayed, you will be asked for the information to upload the attached document in question, which you can upload in the “Select file” section. In addition, you will be able to edit the following fields:
- Title : Name of the document.
- Description : Brief description of the attachment.
- Categorization : You can add tags to find the file in searches more effectively.
- Related content : You will be able to link to content from other parts of the Seu-e 2.0 and the Transparency portal.
- Permissions : You can manage who will view the attachment: Anyone, website members, or only the owner.
Once all the steps have been completed, you will need to click on “Publish” to save the changes.
To upload a second document , go back to editing the item and in the documents section click on the tab on the right “ + ”.
The option to upload a second document will then appear below. To upload it, repeat the previous operation.
When you need to delete a published document , go to the attachments section and click the “Delete” button. To publish the modified content, click the “Publish” button.
To link a web address to a link , go to the text editor and type the name you want to appear in the text as the title.
Then, select this name and go to the “insert/edit link” tab.
Paste the URL and in the “destination” tab, set it to “not defined.” When you publish it, you will be able to access the document through its link.